May
19
2014
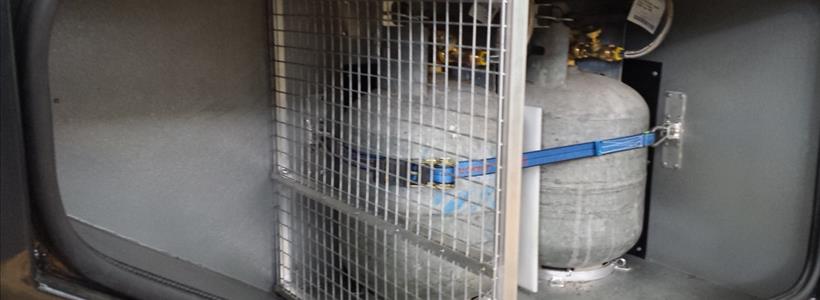
I got the driver's side rear storage cabinet fitted out over the last week or so. The objective for this cabinet was
- to hold 2 x 9Kg gas cylinders and the regulator
- hold the 4 levelling wedges and the wheel chock
- and to have somewhere to store firewood (or maybe a rubbish area - haven't decided 100% as yet).
I bought some re-conditioned old fashioned galvanised gas cylinders. They have been refurbished with new valves and re-tested, so they will be good for another 10 years before needing testing again.
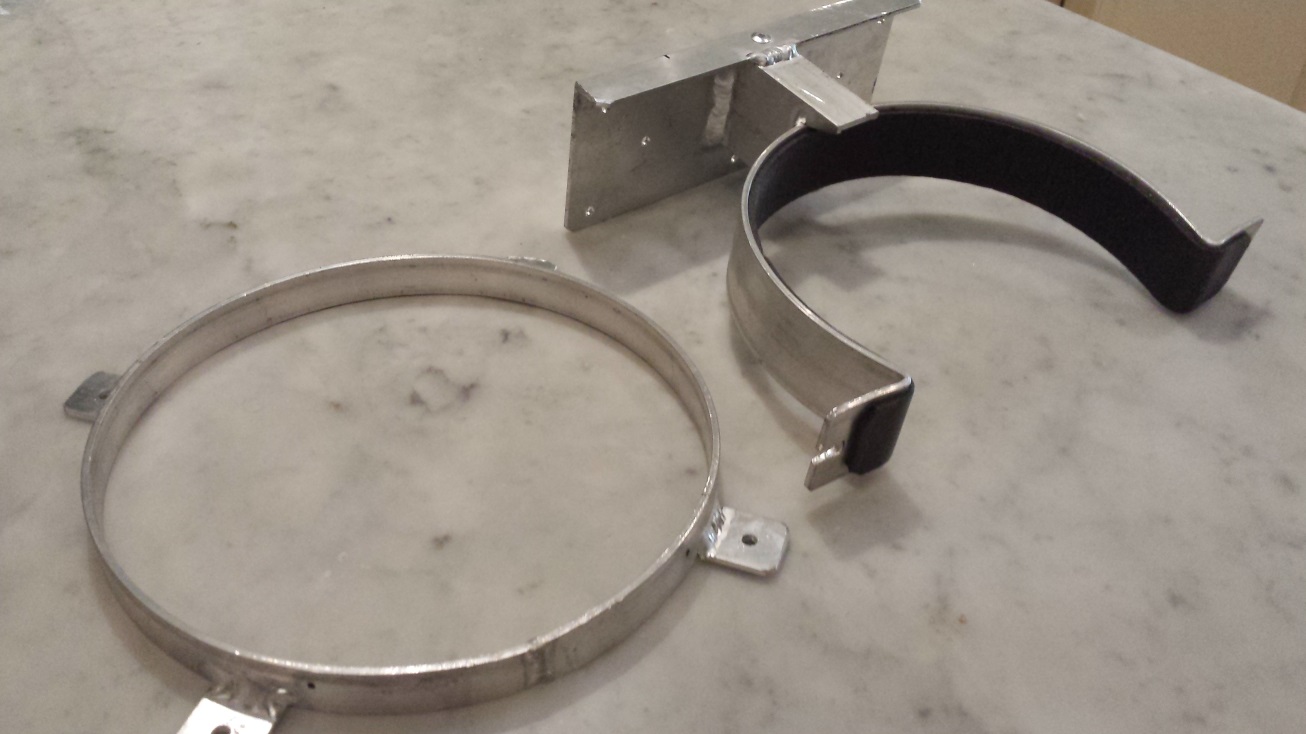
To start with, I had to TIG weld up some custom made brackets. All the brackets I found for sale assume that the cylinder can be inserted into the cage from the top, but mine have to slide in from the side.
The bottom of the cylinder is held in tightly by an aluminium circle. The top assembly is a 'clip' design with a locating wedge at the rear to stop the cylinder lifting at all. A heavy duty rubber strap holds it all in.
The cylinders must have been made by hand, as each base is a different diameter, and the overall heights are different too. I bought 3 of them, and they are all 'individually' sized!
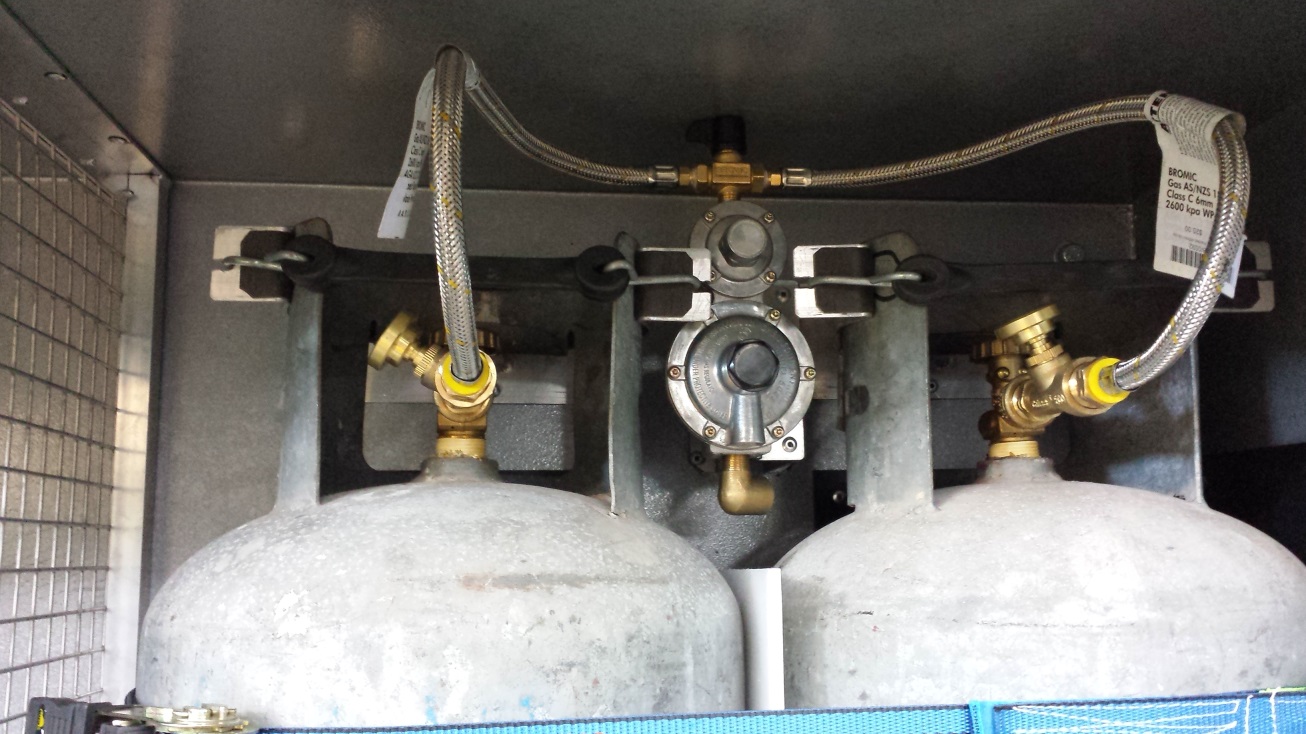
I made an elongated bracket to bring the regulator out from the walls of the cabinet, as my leads were not long enough to reach the valve from the back wall.
There is also a 'backup' strap system, just visible at the bottom of the photo just in case anything comes adrift over corrugations. The cylinders feel immovable!
I will get a gas fitter to connect up the regulator to the stove and water heater with some copper line at a later date (once I've got them fitted permanently).
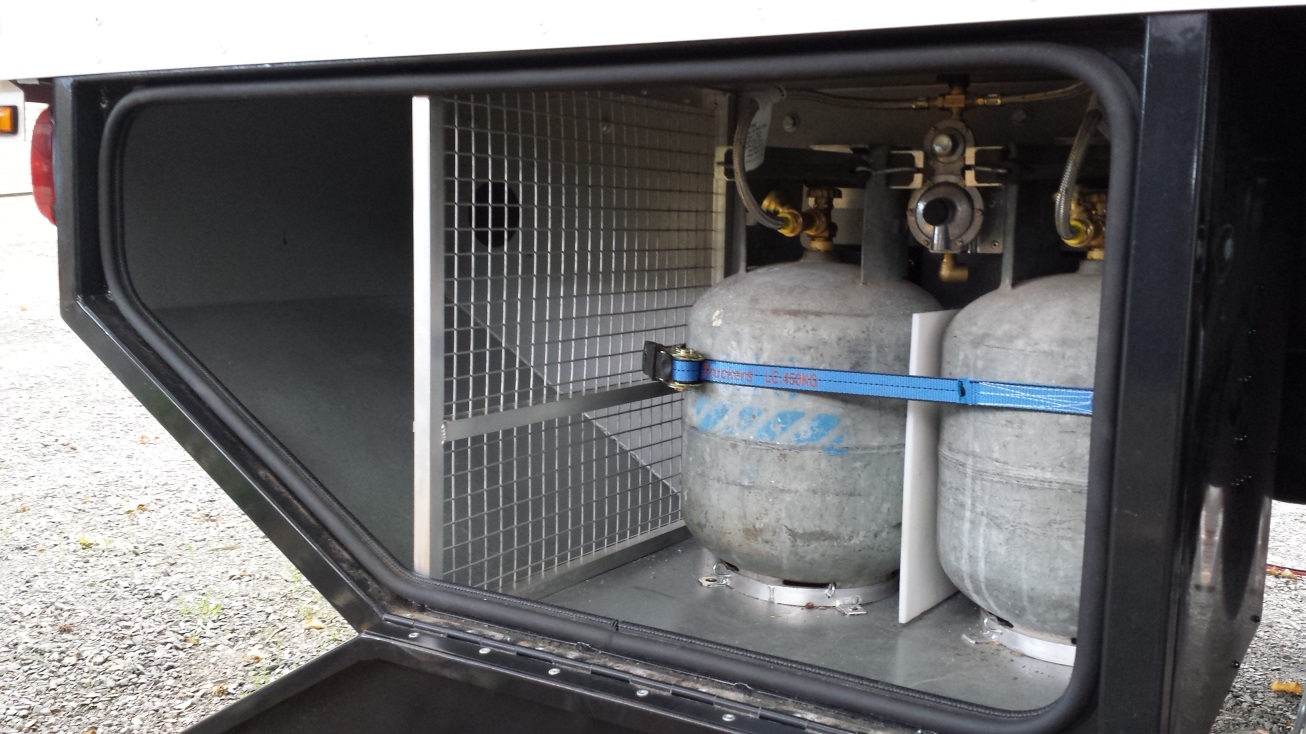
The rearmost angled area is not such a useful area for storing 'square' things, so I am thinking it will either be a wood storage area, or a rubbish/recycling area.
I just TIG'd up a frame and riveted some galvanised mesh to it to stop the wood (or rubbish) from hitting the cylinders, whilst still allowing airflow between the cylinders and the vent at the very rear of the box.
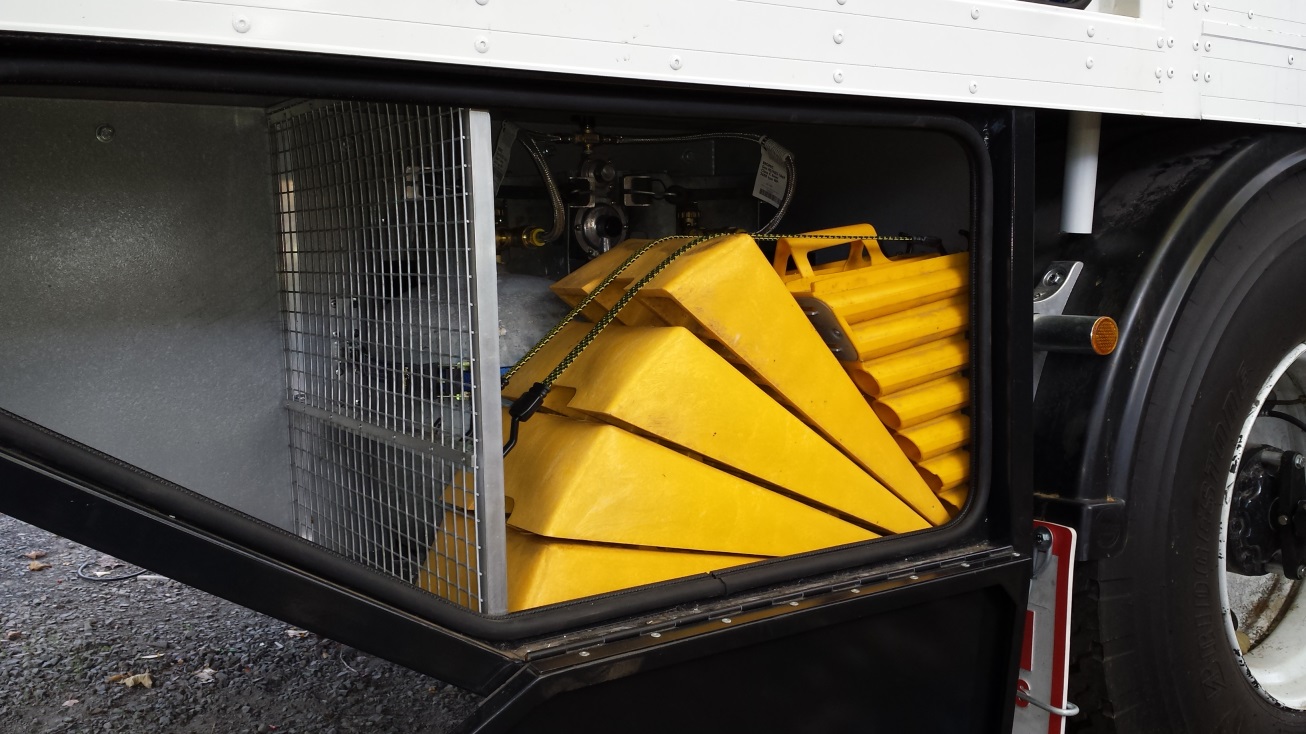
There is the perfect space in front of the gas cylinders to store the wheel wedges (for levelling the truck on uneven ground) and a wheel chock.
I've also done a lot of minor fiddly things, like:
- Getting all the plastic fittings needed to connect the water pump and filters up to the main tank
- Sourcing a water level meter that would work in a 500mm deep tank. All the caravan levels I found assume the tank is no more than about 250mm high. Eventually found one from Germany that will do the job called Votronic: Votronic water level meters
- Adding an LED light to the 2nd garage so I can see in there at night
- Making up a bracket for the twin water filter
- Finishing off the 12v wiring in the bedroom
- Fitting a 12v battery monitor in the cabin to show batter voltage and amps in/out
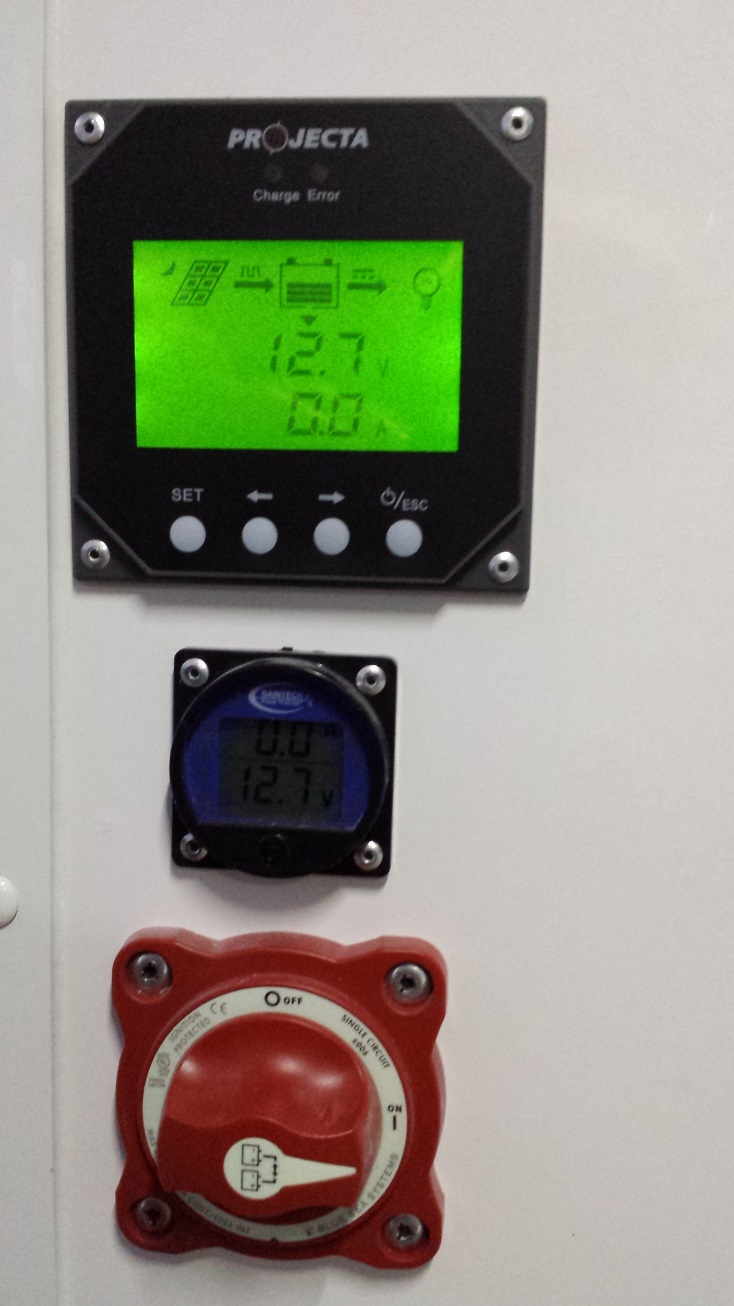 This is the 12v master control switch, which kills power to everything except the fridge for when we leave the camper for a longer period to ensure the batteries are not being used.
The top panel monitors battery voltage and the supply to the fridge. It reports the SOC% (State of Charge) as well as how many AHs have gone in from the solar panel and how many the fridge has used. It also has a built in low voltage cut off at 11.1 volts to turn the fridge off if the batteries get too low.
The middle gauge monitors everything except the fridge and shows +ve amps when the batteries are charging and -ve amps when you are using power.
Everything in the canopy (apart from the fridge) is piped through a low voltage cut off, set to 11.5 volts, so even if we leave something on for an extended period of time the batteries will not be destroyed. The fridge will hang on a bit longer than everything else, as it is set to 11.1v cutoff.
Next job is to get the water system sorted out....
Next post ...